Chef Knife Guide for Beginners and Home Cooks
A dull, awkward knife can make dinner feel harder than it needs to be. A sharp, comfortable kitchen knife does the opposite. It speeds up prep, gives you cleaner cuts, and makes cooking feel calmer.
For most home kitchens, one well-chosen chef knife can handle the bulk of daily prep. It can chop onions, slice tomatoes, mince garlic, cut herbs, break down a chicken, portion vegetables, and even crush a peeled garlic clove under the flat side of the blade.
That does not mean every knife is right for every cook. Blade length, steel type, handle shape, weight, balance, and maintenance all matter. The goal is not to buy the most expensive knife on the shelf. The goal is to find one that feels safe, sharp, and natural in your hand.
What makes a chef knife different from other kitchen knives
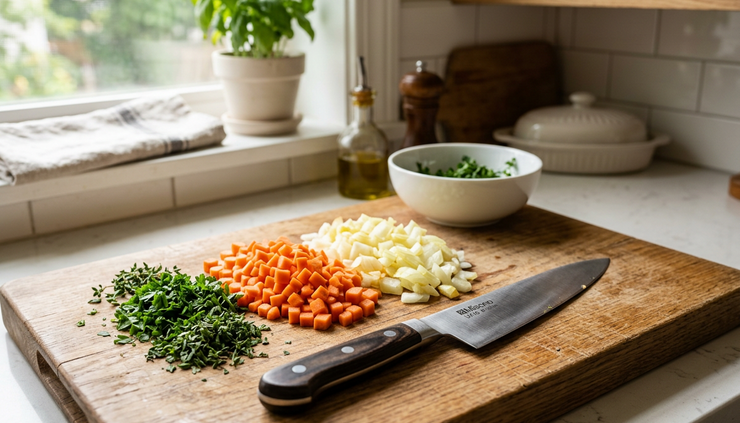
A chef knife is the main workhorse in a kitchen. It usually has a broad blade, a pointed tip, and a curved cutting edge. That shape lets you use several cutting motions with one tool.
You can rock it through herbs, push-cut through carrots, slice through meat, and use the pointed tip for smaller detail work. The broad blade also helps scoop chopped food from the board, though you should use the spine, not the sharp edge, when scraping.
Most chef knives fall between 6 and 10 inches long. For home cooks, an 8-inch blade is the most common sweet spot. It gives enough length for larger foods without feeling hard to control.
A chef knife differs from a paring knife, which handles small tasks like peeling and trimming. It also differs from a serrated knife, which works best for bread and foods with tough skins and soft interiors. A santoku, common in Japanese-style kitchens, is similar in purpose but often has a shorter, flatter edge and a different cutting feel.
Think of the chef knife as your main prep tool, not your only knife. A simple starter set can include:
An 8-inch chef knife for most prep
A paring knife for small hand-held work
A serrated bread knife for crusty bread and ripe tomatoes
Honing steel or ceramic rod for edge care
That small group covers most home cooking without cluttering the drawer.
How to choose the right blade for your hand and cooking style
A knife should feel balanced, secure, and predictable. If it feels too heavy, too light, slippery, or handle-heavy, you will notice it during longer prep sessions.
Pick a length that gives control
The common sizes are 6, 8, and 10 inches.
Blade length | Best for | Trade-off |
6 inches | Small boards, small hands, quick prep | Less efficient for large vegetables and big cuts |
8 inches | General home cooking | May feel large at first for some beginners |
10 inches | Large foods, experienced cooks, bigger boards | Can feel tiring or awkward in a small kitchen |
For most beginners, 8 inches works well. If you have a small cutting board or feel nervous with longer blades, a 6-inch knife can still serve you well. A knife you use confidently beats a larger knife that stays in the drawer.
Notice the weight and balance
There is no single correct weight. Some cooks like a heavier German-style knife because it feels solid and helps cut through dense foods. Others prefer lighter Japanese-style knives because they feel quick and nimble.
Hold the knife with a pinch grip. Pinch the blade just in front of the handle with your thumb and index finger, then wrap the rest of your fingers around the handle. The knife should not tip sharply forward or backward. It should feel like an extension of your hand.
Comfort matters more than brand reputation. If possible, try the knife before buying. Even holding it for a minute can tell you a lot.
Understand steel without overthinking it
Most kitchen knives use either stainless steel or carbon steel.
Stainless steel resists rust and staining. It is low-maintenance and practical for busy home kitchens. Many modern stainless knives sharpen well and hold an edge long enough for normal use.
Carbon steel can take a very sharp edge and is often easier to sharpen. It also reacts with moisture and acidic foods. Over time, it develops a patina. If left wet, it can rust. Carbon steel appeals to cooks who enjoy caring for their tools.
There are also high-carbon stainless steels, powdered steels, and layered steel blades. These can be excellent, but beginners do not need to start there. A good stainless knife from a reputable maker is usually the easiest first choice.
Choose a handle that feels safe
Handles come in wood, plastic, composite, stainless steel, and other materials. Shape matters more than material.
Look for:
A secure grip even when your hand is slightly damp
No sharp edges where the handle meets the blade
Enough room for your fingers under the handle
A shape that does not force your wrist into an odd angle
Some knives have a full bolster, which is the thick metal area between blade and handle. It can add weight and finger protection, but it may make sharpening the heel harder. A partial bolster or no bolster can make the full edge easier to maintain.
The knife shapes and features worth knowing
Knife descriptions can get crowded with technical terms. A few features are worth learning because they change how the knife feels in daily use.
The blade profile affects your cutting motion
A curved edge supports rocking cuts. This works well for chopping herbs and mincing garlic. Many Western chef knives have this shape.
A flatter edge supports push cuts and straight downward cuts. Many Japanese gyuto and santoku knives use flatter profiles. They can feel very precise, especially with vegetables.
Neither is better in every kitchen. Watch how you naturally cut. If you rock the blade often, choose more curve. If you prefer clean forward-and-down cuts, choose a flatter edge.
The tip should match the detail work you do
A pointed tip helps with fine cuts, trimming, scoring, and starting slices. If you cook a lot of meat, fish, or onions, a defined tip helps.
Some santoku-style knives have a sheepsfoot tip, where the spine curves down toward the edge. This can feel safe and steady, but it is less pointed for detail work.
The edge angle affects sharpness and durability
A thinner edge can feel sharper and glide through food with less force. It may also be more delicate if the steel is hard or the edge is very fine.
A thicker edge can survive rougher work but may wedge in dense foods like sweet potatoes or squash.
For home cooking, avoid extremes. You want a knife that cuts cleanly but does not chip the first time it meets a hard carrot at a slight angle.
The finish can change food release
Some blades have dimples, hammered finishes, or textured sides. These features may help food release from the blade, but they do not work miracles. Wet potato slices, cucumbers, and onions may still stick.
Blade geometry usually matters more than decoration. A well-ground blade with good taper often cuts better than a flashy one with a poor edge.

How to use one safely and confidently
Good knife skills do not require speed. Speed comes after control. Start slow and build habits that keep your fingers safe.
Use the pinch grip
Hold the blade near the handle with your thumb on one side and index finger on the other. Wrap your remaining fingers around the handle. This gives more control than gripping only the handle like a hammer.
At first, the pinch grip may feel strange. After a few prep sessions, it usually feels more stable.
Make a claw with your guiding hand
Curl the fingertips of your non-knife hand inward. Let your knuckles guide the side of the blade. Keep your fingertips tucked back from the edge.
The blade should move against your knuckles, not your fingertips. This position helps control the size of each cut.
Keep the board stable
A sliding cutting board makes even a sharp knife unsafe. Place a damp towel or nonslip mat under the board. The board should not shift when you push or chop.
Use a board large enough for the food. Crowded boards cause awkward angles and rushed movements.
Cut with the right motion
Do not slam the knife straight down unless the food calls for it. Most cuts work better with a smooth motion.
Try these common techniques:
Rocking Keep the tip near the board and move the handle up and down through herbs or garlic.
Push cutting Push the blade forward and down through vegetables for clean slices.
Slicing Draw the blade backward or forward through meat, fish, or tomatoes with light pressure.
Chopping Use controlled downward cuts for firm foods, keeping your guiding hand in a claw.
A sharp blade needs less force. Less force gives you more control.
Avoid jobs that damage the edge
A chef knife is versatile, but it is not a cleaver, screwdriver, can opener, or frozen food pick.
Avoid cutting:
Bones
Frozen foods
Very hard shells
Glass, stone, or ceramic surfaces
Food directly on a plate
Use a wooden, plastic, or rubber cutting board. Glass boards look clean but damage edges quickly.
How to care for your knife so it stays sharp
A good knife does not stay good by accident. Basic care takes little time, and it makes the knife safer.
Wash and dry it by hand
Do not put a quality kitchen knife in the dishwasher. Heat, detergent, vibration, and contact with other utensils can dull or damage the blade and handle.
Wash the knife with mild soap and warm water. Dry it right away with a towel. Pay attention to the handle and the area where the blade meets it.
For carbon steel, drying matters even more. A thin coat of food-safe mineral oil can help if the knife will sit unused for a while.
Hone often and sharpen when needed
Honing and sharpening are not the same.
Honing realigns the edge. It helps maintain cutting feel between sharpenings. A honing rod does not remove much metal.
Sharpening removes metal to create a fresh edge. You can sharpen with whetstones, guided systems, pull-through sharpeners, or a professional service.
Many home cooks can hone weekly or when the knife feels slightly off. Sharpening may happen only a few times a year, depending on use, steel, and technique.
A simple tomato test helps. If the knife struggles to bite into tomato skin without pressure, it likely needs edge attention.
Store it so the edge is protected
Loose knives in a drawer bang against other tools. That dulls edges and creates a safety risk.
Better storage options include:
Knife block
Magnetic wall strip
In-drawer knife tray
Blade guard or sheath
If you use a magnetic strip, place the spine against the magnet first, then roll the blade flat. When removing it, roll the sharp edge away from the strip. This reduces edge contact.
What to buy as a beginner
A beginner does not need a large knife set. Many sets include blades that rarely get used. Put the budget into one reliable main knife instead.
Look for these basics:
Comfortable handle
Good balance
Stainless or easy-care steel
6 to 8-inch blade length
Thin, even edge
Solid fit and finish
Easy return policy if buying online
If you shop in person, bring the knife into a pinch grip and mimic a few cutting motions in the air. If you shop online, read comments about handle size, weight, edge retention, and ease of sharpening rather than focusing only on star ratings.
You may also see supplier terms such as china manufactory, chef knife manufactory, chef knife OEM, chef knife OBM, and chef knife ODM when browsing wholesale or private-label listings. These terms relate to manufacturing and sourcing, not daily performance. A home cook should still judge the finished knife by comfort, materials, grind, heat treatment, and quality control.
Price can signal quality, but it does not guarantee fit. A modest knife that feels right and stays sharp will serve better than a premium knife that feels awkward.
If possible, pair the knife with a good cutting board and a basic honing rod. Those two tools help protect your purchase.
A simple routine for everyday prep
The best knife habits are easy to repeat.
Before cutting, set up the board, towel, food, and a small bowl for scraps. Dry your hands. Make sure the knife is clean and sharp enough for the task.
During prep, slow down around round foods. Cut a small flat side first so the food sits steadily. This works for onions, potatoes, squash, apples, and citrus.
After prep, wash and dry the knife right away. Store it safely before wiping the counter or washing the board. This prevents accidents and keeps the edge from sitting wet.
A dependable kitchen knife changes the feel of cooking. Prep becomes smoother, food looks cleaner, and small tasks take less effort. Start with one comfortable, sharp blade. Learn safe grip and cutting habits. Care for the edge. That simple approach will do more for everyday cooking than a drawer full of unused knives.


Comments